Saturday, July 31, 2010
Wednesday, July 28, 2010
Banh Mi

Ian's Birthday Dinner
Pain a L’ancienne
olive tapenade; herbed olive oil
Insalata di Mozzarella
arugula salad, basil oil
Primi
Gorgonzola Dolce con Pere
pear-balsamic reduction
Melanzane Fritte
spicy tomato sauce, pignoli
Secundi
Ravioli di
with lemon butter broth
Conchiglie con Cardofi
marinaras
Dolci
Carmelized Apricot
almond cream, amaretti
Chocolate-Raspberry Birthday Cake
Tuesday, July 20, 2010
Moroccan Chickpea-Sweet Potato Stew

Ed.: totally forgot one very important ingredient (apple) and one optional but delicious ingredient (curry powder) when I posted this. mistakes corrected below.
Although I hesitate to commit so definitely, I am pretty sure this is the best food ever. All of the ingredients are cheap; it is extremely simple to make; you can make a ton at once and the leftovers get better the longer they spend in the fridge; is equally good in all seasons; it is extremely healthy (wide variety of veggies, high protein, no oil); and it is absolutely delicious. Every time I make this, I ask myself why I don't make it every week.
Moroccan Chickpea-Sweet Potato Stew
28 oz can tomatoes (diced, or if they're whole, squish em in your hands)
~2 cups (1 standard can) vegetable broth
1 cup dried chickpeas, soaked overnight OR 1 can cooked chickpeas
4-5 cloves garlic, minced
1-3 jalapenos, minced
3 sweet potatoes, diced
1 orange pepper, diced
1 large apple, minced (or crushed in the food processor)
~1 tbs cinnamon
~1/2 tbs cumin
~1 tbs curry powder
~1 tbs honey
salt and pepper to taste
~2 cups baby spinach
~1 cup coconut milk (1/2 a standard can)
If you're using dried chickpeas:
Heat up your tomatoes (with all the can liquids) and vegetable broth, plus the minced garlic and chilis, in a big pot. Put the chickpeas in first, cover, and boil on medium-high until they're tender. Then turn the heat down a bit and add everything except the coconut milk. If the veggies aren't covered, add a bit more broth or water (they can be half-submerged). Cover and boil everything until the veggies are tender. Stir in the spinach until it wilts. Add the coconut milk and adjust the seasoning. Puree some portion of the soup to your liking - I like about 1/2 pureed.
If you're using canned chickpeas:
Heat up your tomatoes (with all the can liquids) and vegetable broth, plus the minced garlic and chilis, in a big pot. Add everything except the coconut milk. If the veggies aren't covered, add a bit more broth or water (they can be half-submerged). Cover and boil everything until the veggies are tender. Stir in the spinach until it wilts. Add the coconut milk and adjust the seasoning. Puree some portion of the soup to your liking - I like about 1/2 pureed.
Enjoy!
Sunday, July 18, 2010
Wednesday, July 14, 2010
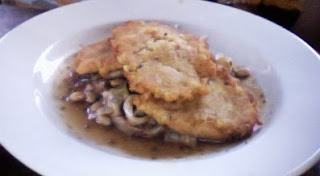
Crispy Polenta Cakes w/ Cabbage and Beans

>
Do not make our mistake and cook this in the summer. From the cabbage to the white beans to the dark beer to the caraway, this is wholly a cold winter night comfort food. I would also recommend a few tweaks on the original to make it better, suggested below.
Crispy Polenta Cakes with Cabage and Beans
1 onion, thinly sliced
1/2 head cabbage, thinly sliced
few tbs cup apple cider vinegar OR lemon juice
~3 cups leftover polenta
~6 oz dark ale
1 tsp caraway seeds
1 tsp+ mustard
2 tbs butter
1 cup cooked white beans
heat a bit of olive oil in a large pan and toss in your onion and cabbage. Add a pinch of sugar, a bit of vinegar or lemon juice, and salt and pepper to taste. Stir-fry until they both get soft and browned to your liking.
We made our sauce just by pouring the ingredients over the cabbage, but I would recommend food-processing your if possible, or grinding the caraway before adding it. The large caraway seeds in our sauce were a little bit unpleasant. Either way, you want to end up with a sauce of the beer, caraway, mustard to taste, and salt and pepper to taste, reduced a bit and poured over the cabbage and onion. Stir in the beans.
Heat some oil in another pan. I made the mistake of trying to make a cake out of very soft polenta and ending up with a terrible half-fried gloppy mess sticking to my pan. So make sure your polenta is cooked very firm, and if it's not, stir in flour until it gets there. if your pan isn't perfect, you're going to need a good amount of oil and lots of careful attention to keep the cakes from sticking and breaking... but you will be rewarded with awesome crispiness. put a lump of the polenta into the oil, flatten it with your spatula, and then immediately push it from it's initial landing point to prevent sticking. keep moving it around as it cooks and flip when it's brown. put a few cakes on top of the cabbage and enjoy!
Tuesday, July 13, 2010
Polenta w/ Charred Vegetables

This is awesome comfort food, good for a cool, rainy summer day. Healthy too, if you use part-skim ricotta and no butter, and maintain a high vegetable-to-polenta balance.
The tomato oil was just to be fancy - you could replace it with some jarred tomato sauce, or add tomatoes to the vegetables, or go sans-tomato (I would recomend drizzling with a bit of balsamic in this case to increase the sweetness and acidity).
Ricotta Polenta with Charred Vegetables and Tomato Oil
2 cups corn meal
~6 cups water
2 cloves garlic, minced
~1 cup ricotta
- 2 tbs butter (optional)
~2 cups mixed vegetables, chopped (we used zucchini, broccoli, red pepper, and onion)
1/2 lemon or lime
2 big, ripe, tasty summer tomatoes, or two handfuls mini-tomatoes, chopped
~ 1/4 c olive oil
Make the polenta by stirring together the water, cornmeal, and garlic in a big pot. Boil on medium until it gets soft and smooth, stirring pretty often to keep it from clumping, and adding water if it gets hard to stir. Once it's done, stir in the ricotta and optional butter and season with salt and pepper to taste.
While the polenta cooks, whiz the tomatoes in a food processor with the olive oil. If you don;t have the necessary equipment for this step, replace the tomato oil with some tomato sauce, or cook the tomatoes along with the other vegetables.
Heat a bit of olive oil in a big pan on medium-high. If you're using broccoli or other slow-cooking vegetables (e.g. carrots, potatoes) steam them in the microwave for a minute or two until they're half-cooked. Toss all of the vegetables in the oil, then let them cook without stirring so that they get charred on one side. Stir and flip them, and then wait a few minutes again. Repeat until they're nicely browned on all sides and cooked through. Season with salt, pepper, and lemon/lime juice to taste.
Pour some tomato oil onto your place, add a lump of polenta, and pour the vegetables over top. Enjoy!
Friday, July 9, 2010
Vegetable Dumplings (& spring rolls & peanut sauce)

Thursday, July 8, 2010
Key Lime Pie
Key Lime Pie
2 packages graham crackers (usually 1/2 box)
6+ tbs unsalted butter
sugar to taste (a few tablespoons should do)
salt to taste
5 egg yolks, whisked together
1 14 oz can sweetened condensed milk (it's good to an extra on hand)
lots and lots of limes, key or otherwise
vanilla whipped cream (heavy cream + vanilla + whisk)
Preheat 375. Crush your graham crackers - start by pounding on the bag with your fists, try a rolling pin/stomping, just be careful not to rip open the bag and create a crumb explosion. dump em into a bowl and crush any remaining large chunks with your fingers. alternately you can whiz them in a food processor, but i like the rougher texture when you do it by hand. add the sugar and salt to taste. melt the butter and pour it over the crumbs, and mix it in with your fingers. add more if it's not wet enough to hold together, but not so much that it gets soggy. press the crumbs into the bottom and sides of a spring form pan or pie dish. Bake for 5 - 10 minutes, until it starts to color but before it gets real brown.
Pour your sweetened condensed milk into a bowl and start juicing/zesting those limes. If you're using key limes, I'd say zest about 1/2 of the limes; if you're using regular, zest all of them. The zest makes the pie deliciously fragrant and beautifully green, but if you add a TON it might start to get bitter. Taste the filling after each lime and keep going until it tastes perfect. Don't be shy, no one likes a boring pie. If you go too far, crack open another can of condensed milk and add a little at a time until it balances out. If you want a higher filling to crust ratio, go ahead and use 2 full cans of condensed milk plus however many limes it takes. when the taste is good, beat in those egg yolks, then pour the filling over the crust. Bake another 10 - 20 minutes, depending on how much filling you've got. When the pie is ready, it should be firm on the edges and still a bit jiggly in the middle. refrigerate for a LONG TIME, like AT LEAST TWO HOURS. It's really hard to resist eating it early but if you try it will ooze out all over your plate which is just depressing after all of that work. serve with vanilla whipped cream. enjoy!
Salad w/ Lentil Patties and Lime-Yogurt Dressing
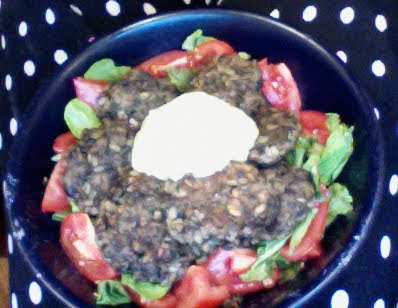
Salad with Spicy Lentil Patties and Lime-Yogurt Dressing
1 jalapeno, minced
2 cloves garlic, minced
1 small onion, diced
1 cup black lentils
1 egg, beaten
1/4 cup breadcrumbs
cumin to taste
juice of 1 lime
1/2 cup yogur
lettuce
really awesome tomatoes, diced
onions, sliced thin (optional)
handul cilantro, chopped (optional)
Pressure-cook your lentils with an equal amount of water until pretty soft (or follow the directions on the bag). Set aside.
Heat up some oil in a big pan and sauté the jalapeno, garlic, and onion until soft. Add to the lentils and mix in the egg, breadcrumbs, cumin, and salt & pepper to taste.
Reheat the oil. Drop lumps of the dough into it, then use a spatula to press them into discs. Cook on medium-high until each side is brown and crispy.
Whisk together the yogurt and lime juice. Fill a bowl with lettuce & tomatos & onions, put the warm patties on top, and top with lime dressing & cilantro. Enjoy!

Roasted Squash w/ Arugula & Goat Cheese
Roasted Squash with Arugula and Goat Cheese
2 acorn squash, cut in half and gutted
2 Tbsp chopped fresh mint (add any other herbs you've got lying around, the more the better)
1/4 cup red wine vinegar
1/2 cup olive oil
bunch baby arugula, chopped
8 ounces goat cheese, crumbled
Preheat the over to 400. Brush the squash halves with olive out and sprinkle with salt and pepper. Roast for about 45 minutes, until very soft.
Whisk or puree together the herbs, vinegar, oil, and salt and pepper to taste.
Fill each squash half with goat cheese and arugula, then top with vinaigrette. Scrape the squash flesh into the salad and mix everything together as you eat. Enjoy!Burnt carrot & goat cheese salad
2 tbs red wine or balsamic vinegar
1/2 cup EVOO
8 medium carrots, peeled and sliced into sticks
1 small bunch flat-leaf parsley, chopped
1 bunch arugula, chopped
6 oz goat cheese, sliced 1/2 inch thick
Whisk together the vinegar and olive oil, plus salt and pepper to taste.
Toss the carrots in oil, salt, and pepper, then place in a single layer on a hot pan and cook without turning until they char on the bottom. turn them over and cook the other side until they are al dente.
Combine the parsley and arugula and toss with half the vinaigrette. Place the carrots on top.
Reheat the pan on very high and add a few tbs of oil. Add the slices of goat cheese. As soon as the cheese blackens on the bottom, remove the slices with a spatula and invert onto the carrots. drizzle with the remaining vinaigrette.
Vegetable enchiladas w/ green sauce
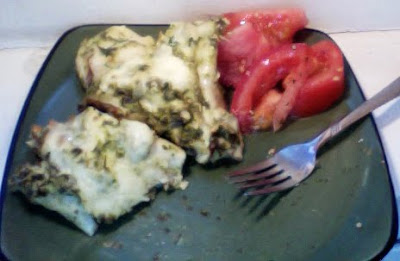
Vegetable Enchiladas with Green Sauce
~ 2 cups assorted vegetables, cut into thin sticks (we used carrots, red peppers, onions, and broccoli)
Black or kidney beans
Cumin
small bunch cilantro
some parsley if you've got it
~1 tightly packed cup spinach
2 jalapenos (more or less depending on how spicy you want it)
juice of 1 lime
2 big cloves garlic
pinch sugar
~ 1 1/2 cups crema (see previous recipe)
1 package tortillas (don't bother making your own, they're only going to get soaked in sauce)
Monterey Jack (or any other) cheese
Sautee your vegetables on high to get a little bit of char on them. Don't let them get soft - they're going to go in the oven after this. Halfway through, add some salt, pepper, and cumin to taste, plus the beans.
Make the sauce by pureeing the jalapenos, cilantro, parsley, spinach, lime juice, garlic, sugar, and salt and pepper - add some water or vegetable broth if it needs it to get smooth. Adjust all of the amounts to taste. Stir in the crema and adjust the flavor again.
Preheat to 350. To assemble: Pour a bit of the sauce in the bottom of a baking dish. Soak your tortillas in water for a minute before using them in order to soften them up. Lay some vegetable mixture near one side of the tortilla and then roll it up tight like a sleeping bag and place it in the dish. Repeat with all of them - my tortilla package fit perfectly into my dish - if yours doesn't, fill in the corners with tin foil. Pour the rest of the sauce over the tortilla rolls. Shred your cheese over the top to cover in a thin layer. Bake for about 20 - 30 minutes, until the cheese is bubbly. Serve with awesome tomatoes drizzled with olive oil.

Crema
Buttermilk Honey Bread
1/2 tbs instant yeast
1/2 tsp sugar
3/4 cups buttermilk, warmed up a bit (not hot or you'll kill the yeast)
1 tbs unsalted butter, melted and cooled to room temperature
1 1/2 tbs honey
1/2 tbs salt
3 cups all-purpose or bread flour
Stir together the water, yeast, sugar, buttermilk, butter, honey, salt. Add 2 cups of the flour and mix it in with your hands until it's homogenous. Then slowly mix in the rest of the flour. Knead the dough for a really long time, adding more flour whenever it gets sticky. It should be very smooth and pass the windowpane test when it's ready (i.e. be able to be stretched enough to see light through it without ripping). Transfer the dough to a lightly greased bowl, turning once to coat, and cover the bowl with a clean towel. Let rise at room temperature until doubled, about an hour or a bit more.
Punch down your dough gently, form it into a ball by stretching its surface and tucking it under (if you don't know how to do this, watch this: http://www.youtube.com/watch?v=XjZAGc2xyqg&feature=related. Make sure you pinch the bottom edges together tightly so they don't come loose. Set it on the counter, cover it with a towel, and let it rise for another 45 minutes. If you're planning on baking it free-form, it helps at this stage to surround it with objects pressing against its sides (we used tinfoil and tea boxes) to keep it contained in a small area so that it doesn't flatten out. If you're using a pan, don't worry about it.


